- GESSO YOUR CANVAS
- PAINT CORRECTLY TO AVOID CRACKING
- ORGANISE YOUR PALETTE WELL
- BE GREEN WHEN YOU CLEAN
- TONE YOUR CANVAS
- HOW TO FIX THE PROBLEM OF GESSO LINES
- HOW TO TIGHTEN YOUR CANVAS
- EQUIPMENT I USE
- USEFUL TECHNOLOGY
- SMART PACKAGING
- MY STEPS WHEN PAINTING IN LAYERS
- IDEA FOR A DRYING RACK
- HOLDING AN ART EXHIBITION
- KEEP ON LEARNING AND PRACTICING
- TIPS FOR WHEN YOUR WORKING SPACE IS YOUR LIVING SPACE
- CHERISH YOUR WORKSPACE
GESSO YOUR CANVAS

● Gesso is a primer, usually white or black, which will greatly enhance the quality of your canvas, as well as your painting experience. Gesso will protect your canvas from moisture in the paint getting trapped under the paint layer(s). It also provides an excellent surface for paint to grab on to strongly. Here is my method, using watered-down universal gesso (suitable for both oil and acrylic painting) and a 5cm wide brush.
1. Apply gesso with brush strokes going in one direction parallel with the canvas. Let dry.
2. Apply gesso with brush strokes in the other direction (90 degrees to your first layer). Let dry.
3. Lightly sand with fine sanding paper. Clean off gesso dust (I recommend using a dust mask).
4. Repeat steps 1 – 3.
NOTE: Remember to gesso the canvas edges too at least a couple of times during the whole process.

● Gesso more than one canvas at a time. While waiting for your gesso layers to dry wrap your brush in a wet paper towel. This way you will be able to prepare many canvases and only need to wash your brush once at the end. My gesso brush is quite wide, so I don’t like to wash it any more than I have to.
PAINT CORRECTLY TO AVOID CRACKING

● There are certain principles you must follow so that an oil painting hardens correctly. This applies when the painting is done in more than one session, with wet paint being added on top of a drier layer. If a dry paint layer has a less dry layer beneath it cracks may well appear. The less elastic top layer is unable to cope with shrinking / expansion that may happen in the still shifting layer below it. To avoid this:
- Start with thinner paint layers. This also ensures that you can easily make changes to your artwork later on without any thick ridges or bumps of paint on your canvas.
- Later layers should be oiler, hence slower drying.
- Different oils that you can add to your paint to improve sheen and workability may have different drying rates. I like to use just one type of oil medium per artwork (usually safflower oil).
● The picture above is of an oil painting that I abandoned and threw out because it broke the fundamental rules of oil painting and would not have been a long lasting quality artwork. These days I do the following when using water mixable oil paints to paint in layers:
1. Paint + thinner to tone my canvas with a background colour.
2. Just paint when roughly blocking in my composition.
3. Paint + a little safflower oil to add more detail
4. Paint with larger ratio of safflower oil for final details.
TIP: A small palette knife is useful for picking up oil medium and then dripping it on your paint. The same tool can be used to work the oil into your paint. A knife can be quickly and easily wiped before working with a new colour.
ORGANISE YOUR PALETTE WELL

● My palette is hardly a limited one (some artists manage quite happily with very few colours), but I do try to keep it the same each time I paint. This allows me to get to know my colours over time; how they perform and how they mix with one another. I lay out my colours in the same order on my palette each time, generally following the order found on a colour wheel. (see EQUIPMENT for details of my colour palette).
Many artists enjoy using a glass palette to put their paints on, sometimes with a grey coloured layer under the glass to help judge the values of colours better. I’m happy using used old milk cartons for my palettes. They’re a bit floppy so when holding it in my hand I put it on a wooden palette. The base of the carton is useful for containing mediums and acrylic high flow paints. Before disposing of my palette I try to scrape of as much paint as possible with a palette knife. Painting canvas edges is often a useful way to dump left over sludge-coloured paint.
BE GREEN WHEN YOU CLEAN
● I personally enjoy using water mixable oil paints and acrylic paints rather than tradition oil paints which require solvents to help paint flow and for cleaning brushes. Water mixable oil paint can be washed in water because the oil which binds the pigment has been chemically altered to accept water molecules. I don’t have to safely dispose of used solvents, but I do need to avoid washing paint down the drain. I do this by using very small amounts of water in a jar to wash my brushes, which I then pour onto some toilet tissue. When the paper is saturated I dispose of it in the waste bin. Only when my brush is as clean as I can get it, do I remove the plug from the drain hole and wash thoroughly to remove any remaining soap from my brush.
● I avoid using massive brushes and sponge rollers which are a big job to clean. Silicone shapers and palette knives are quick and easy to clean with nothing more than a damp paper towel.


TONE YOUR CANVAS

● Although not a requirement, applying a toned background to your painting has a number of benefits:
- It helps you to judge the values of your colours better.
- You no longer have a big blank white canvas staring at you when you start your artwork.
- Patches or flecks of your background may poke through later layers to give an appealing overall effect.
- A toned background can work nicely with a later layer if the two are complimentary colours, or simply work well together.
● Apply a very flowing layer of paint to the canvas, but not so diluted as to compromise the integrity of the paint. With a rag or paper towel wipe away the excess, then rub the canvas until the colour takes on a nice glow. There should be no texture to the touch what so ever.
● Popular choices for toning are usually earth tones and neutral shades, like grey or brown. I like to use burnt sienna which has a nice warm reddish tone.
HOW TO FIX THE PROBLEM OF GESSO LINES

● I’ve noticed that when I apply gesso the canvas fabric contacts the wooden frame below (even after tightening) and leaves problematic lines where the gesso has collected and formed a pattern. I like to paint with thin layers, so this is quite hard to cover up. To remedy this problem I have cut out thin plastic straps which can be inserted between the canvas and wooden frame so that there is no sharp edge for the brush to push down against. I have colour-coded the straps so that they can be easily fitted together in the correct arrangement.

HOW TO TIGHTEN YOUR CANVAS


● Insert the wooden keys into each corner. The tightness is good when the key needs just a little help from a hammer to get it in. If the key is too thin to fit tightly apply some tape to the tip. The keys will make a slight 45 degree gap in the corner of the frame which drives the wood outwards and tightens the canvas fabric. The canvas should be tight like a drum. Note: The keys won't line up quite the same as in the photo for all wooden canvas frames. It's okay if the keys cross over each other a bit.
EQUIPMENT I USE

- Oil and acrylic paints
- Safflower oil (flow and sheen)
- Thinner for water mixable oils (toning canvas)
- Acrylic mediums (effects and sheen)
- Jars (washing / holding brushes)
- Gesso
- Hammer (inserting keys)
- Pliers (Squeezing paint out of nearly empty tubes / attaching eyelet screws and wire to paintings)
- Paper towel roll (cleaning / wiping off excess paint)
- Easel
- Canvases
- Variety of brushes and painting tools (including a fine brush for signing works and a wide brush for applying gesso)
- Paper cups (gesso-water mix)
- Spray bottle (keeping acrylic paint on palette moist for longer)
- Dust mask (protection from gesso dust when sanding)
- Gloves (protection for hands when squeezing paint)
- Wire (for hanging paintings)
- Palette (milk carton and plywood palettes)
- Scissors (opening packaging)
- Ruler with padded ends (making straight lines on canvas)
- Tape (fixing loose wooden keys when tightening canvas)
- Big vinyl cloth / cardboard sheet (protecting floor / kitchen table)
USEFUL TECHNOLOGY

● I often use an overhead projector for transferring my reference picture to canvas. I trace my image with a fine marker onto a sheet of transparency plastic which I have resting against my laptop screen.
● Digitally it is easy to collect and store reference photos in well-organised folders. My ‘Future Paintings’ folder is something I give very careful consideration to. I will probably only paint a fraction of the images in there. Take time to pick just the right image.
● Online creative communities, like Pixabay and Paint my Photo, are a great source of reference images and a chance to contribute your own photos for other creative people to use and enjoy.
● I use an iPad to display my reference image, which saves on printer ink and allows me to zoom in on parts of a picture. I have a repurposed wooden grate hanging on my easel on which I can easily fit my iPad by pushing the flap of the protective cover through the grate. It’s a good idea to fasten the device to the grate. Also, a small nail will keep the grate from slipping off the easel.

- Apps can be useful for generating ideas for more abstract or surreal artworks. Here are some examples using the Photo Booth app which came with the iPad. Just fooling around with shots of ordinary things like lamps, rugs and toy blocks can produce weird and intriguing images. It’s fun, easy and as quick as the click of a button.

- Computer art programs are good for cropping and modifying potential reference images. I sometimes render photos into digital oil paintings to assess what they may look like as an actually painting. The photo below is an example of a modified image, and suggests that this picture could have potential if painted in a bold style.

SMART PACKAGING


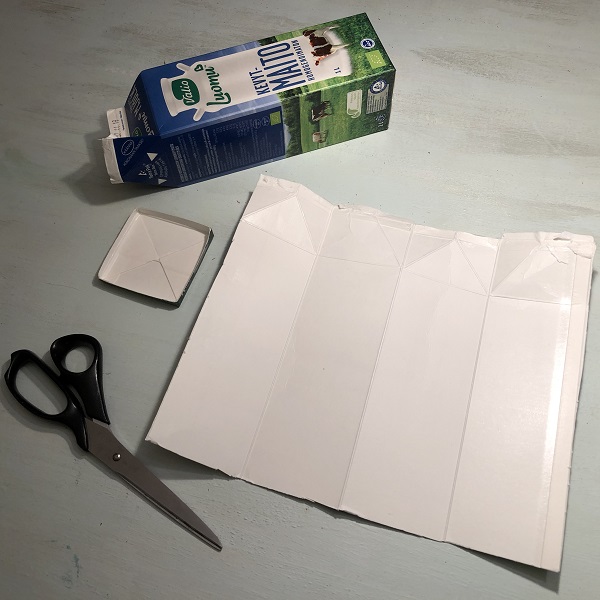
● I like to buy in bulk online. It’s cheaper and comes easily to my front door. Ordering many canvases of the same size makes for tidy packaging with no extra padding. The boxes are also just the right size for storing / transporting paintings, or easily recycled.
MY STEPS WHEN PAINTING IN LAYERS

1. Sketch outlines. Some artists use charcoal or pencil. I like to use thinly applied neutral coloured paint with a small brush. To make my sketch I use one of the following: overhead projector, grid method, or drawing freehand.
2. Blocking in. Mapping out dark and lighter areas gives me a good feel for the painting to come. I think about what colours might go well with later layers, especially if those colours are transparent or semi-transparent. There are symbols on paint tubes which indicate how transparent a colour is. Blocking in can be very rough and quickly done. Avoid creating texture at this stage.
3. Each layer adds detail and brings the colours closer to reality. I try to keep the paint surface relatively flat. Bumpy texture can cast distracting shadows in certain lighting situations. Thick oil paint dries very slowly and also limits your options with further layers.
4. Final touches. I save the stuff that pops, like bright highlights, for last.
IDEA FOR A DRYING RACK

● Here’s a simple rack I built in my work room for holding wet oil paintings. To avoid screwing any holes in a nicely wallpapered wall, the rack is simply held in place by a small cabinet positioned in front of it. The wooden pegs that go in the holes can be moved around to accommodate different sized paintings.
HOLDING AN ART EXHIBITION

● Places in my area where it is possible to hold exhibitions at little or no cost include: libraries, city halls, hospitals. It pays to check out a venue in person to assess lighting, available space, and methods used for hanging works. Remember to book a spot well in advance for popular venues.
Also consider the logistics of transporting your works. If you don’t have a car and would like to exhibit bigger pieces, consider creating multi-panel paintings that sit together to make a whole artwork.
Think too whether you would like to hold an opening event for your exhibition, possibly with friends and family.
A joint exhibition with other artist(s) can be lots of fun, and also financially and logistically wise if the venue is expensive or very spacious.

● Here are some materials I like to display on a table at my exhibitions:
- Guest book with pen attached on wire (even if your paintings don’t find a new home, your pen might)
- Business cards
- Artist biography and CV
- List of exhibitions (past, present and future)
- Info about numbered artworks in the exhibition, including: type of medium, size, name of work, price (if allowed to be displayed), acknowledgement if using a borrowed reference image
● Also good to take along when setting up an exhibition:
- Tape measure
- Extra wire and fasteners
- Basic tools, like wire-cutting pliers / small hammer / scissors…
- Flyers (promoting event) for nearby billboards
- Just like MacGyver, you can’t go wrong with a roll of tape and a Swiss army knife (just in case)
KEEP ON LEARNING AND PRACTICING

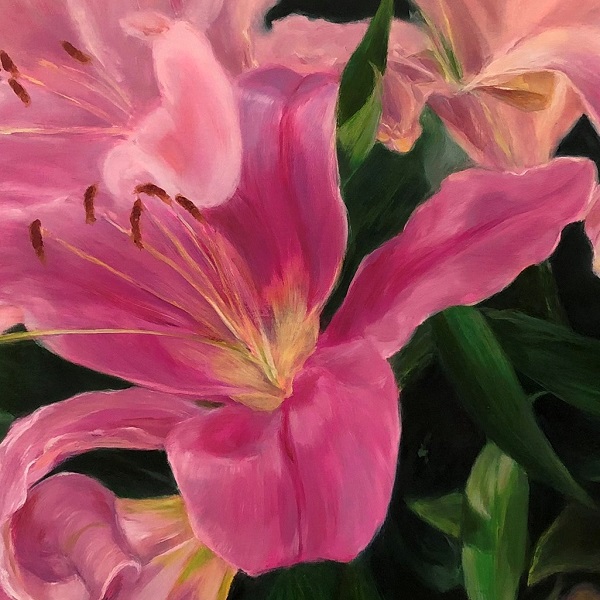
● A few months, and many great YouTube painting videos later I decided to redo this painting. By not rushing, and by really listening to what some professional artists had to teach, I feel I made a big improvement. Here are some experienced artists with very comprehensive videos and great information on the internet:
- Andrew Tischler
- Mark Carder
- Michael James Smith
- Will Kemp
TIPS FOR WHEN YOUR WORKING SPACE IS YOUR LIVING SPACE
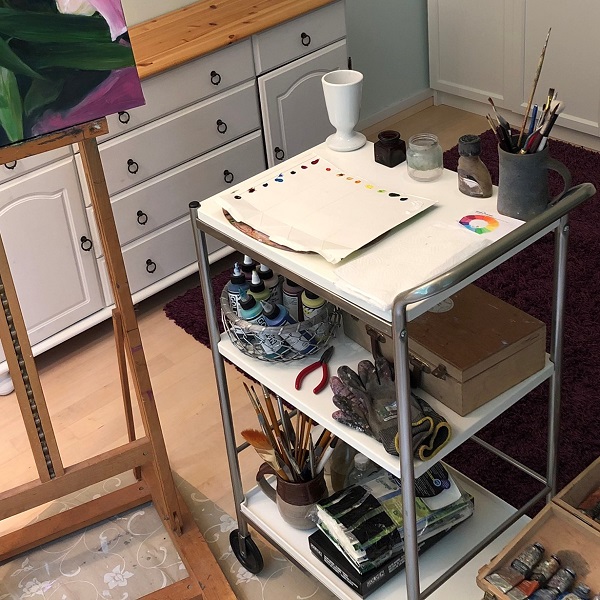
● A trolley is a good work table, stores lots of equipment, and is quick and easy to move to an out of the way place when you aren’t using it.
● Choose a place in your home with good natural lighting and ventilation to paint.
● A small folding stool is a handy addition to your main work surface. Store something bulky there, like a box of paints.
● Protect your floor where you are painting with some kind of covering that you won’t trip or slip on.
● A dining table makes an excellent work top. A big piece of packaging cardboard gives good protection.
● A good bright light on a tall stand is very useful, and easy to move around.
● Use different areas of your home for different things eg: dining table for gesso work, lounge for painting, spare-room for storage…
● A foldable screen or partition is useful when photographing or videoing your art. It makes a good neutral backdrop, and helps preserve the privacy of your home.
CHERISH YOUR WORKSPACE
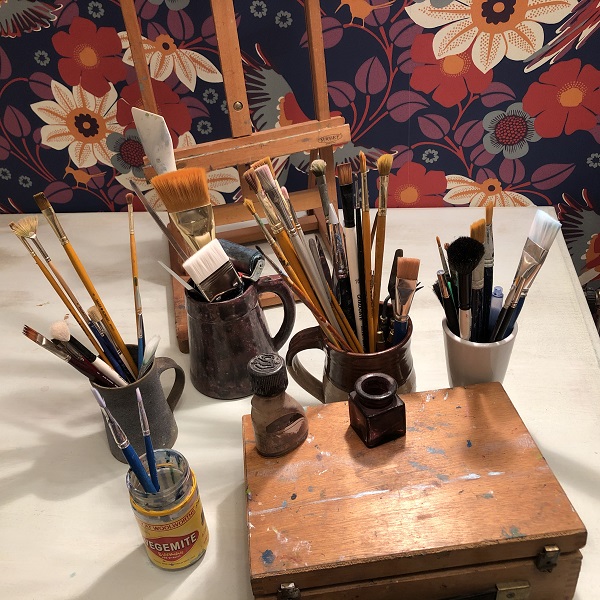
● I think an old paint-splattered wooden petanque box for my paints, and big clay mugs from the recycling centre for my brushes looks splendid. Also, if pictures / videos of your work space appear on social media or your website it’s professional and pretty if everything looks good. So, have fun getting creative with your creative tools!